31 May 2012

Day5: A Cut Above


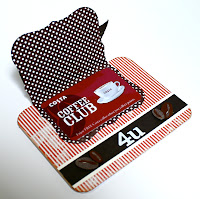
Die cutting layered ribbons.  an instruction by Nichol Magouirk.
This is the first time for me to show you the step-by-step process of making a card...
I don't know if these photos make sense to you....

 
1: using my leftover JUNK ribbons :P     2: chose ribbons and layer them.

3: apply strong adhesive.      4: trim off excess ribbons.

  
 5: die cutting.          6: cut out pattern paper too.

    
7: more die cut ribbon & paper.      9: add black thread.      

  
      8: make sue cover a needle point!  10: adhere ribbon on to paper.

    
11: apply powder to prevent static.   12: stamp a message with VersaMark. 

  
  13: apply embossing powder.    14: apply distress ink to the edge. 

   
      14: poke holes (fake needle work!!)  15: assemble all embellishments.
....whew.... !

Thank you very much for visiting my blog.

30 May 2012

partial die cutting


Such a fun technique, taught by Amber Daigre. I'm a big fan of all her creations!
She makes such clean and neat paper crafts.

Day 4; it seems it was her first video, the world premiere! but it was really a great video!
Like her other works, it was perfect!
Amber seems to use a Cuttlebug machine very comfortably.
That is another amazing thing, because I really gave up my Cuttlebug!
If I didn't have a VAGABOND, I really wouldn't have been able to enjoy the class.

I actually need to practice more for partial die cutting. I understand the construction of this card now. For the next time, I want to think about more design.
... well... for that, I need to buy more thin metal dies...!
more shopping...:P


. ✰ •✰˚* ˚ ★ ˚♥♥ 。✰˚ supplies˚ ♥♥. ✰ •✰˚* ˚ ★ ˚

Thank you very much for visiting my blog.

29 May 2012

Day4: A Cut Above


It's such a educational video by my mentor Jennifer. She always gives us very useful tips and "tricks"!
In Day 4, she showed us how to Microfine Glitter.
It's funny & my another mastery... I NEVER had Glitter. I have Glitter Glue, but I have never thought buying "Glitter". so... Glitter is definitely on my shopping list now!
If I had one, I wanted to apply on to the "coffee" circle... In fact, I should send an order today..!


. ✰ •✰˚* ˚ ★ ˚♥♥ 。✰˚ supplies˚ ♥♥. ✰ •✰˚* ˚ ★ ˚

Thank you very much for visiting my blog.

28 May 2012

shaped card


This looks a tag... but NOT...this is a "TAG SHAPED" CARD!!
Day 3, the teacher was Shari Carroll. She always makes such a beautiful cards.
For the class, she used a Tim Holtz Vintage Cabinet Die. This die has been in my shopping list for while, but I haven't been able to buy it yet, so.... I had to think something alternative. This Tim Holtz Tag Die  was only what I've got at the moment.... so... it looks a tag, but it's a CARD!... :P
I adhered Dark Pink pattern Vellum behind the butterflies, instead of acetate.


. ✰ •✰˚* ˚ ★ ˚♥♥ 。✰˚ supplies˚ ♥♥. ✰ •✰˚* ˚ ★ ˚

Thank you very much for visiting my blog.

27 May 2012

Day3: A Cut Above


well, well, well, Coloring Tilda with copic markers!!  Forgive me! I know it's not well done... :(
I wasn't not confident to upload this card....
it was particularly difficult to colour on her skin...  but! I'm still working on & practicing... so... the next one, should be better & improved... I hope!

This is a small card 8.5 x 11.5 cm. It's a very good size for sending little message to friends.
I've never though making a card with die cuts, but I really like this size :) it's so CUTE!


. ✰ •✰˚* ˚ ★ ˚♥♥ 。✰˚ supplies˚ ♥♥. ✰ •✰˚* ˚ ★ ˚

Thank you very much for visiting my blog.